Discover how a painting goes from blank sheet to finished artwork
So often people see a finished artwork but have no idea of either what inspired the artist or how the painting developed from white space to finished image. Today I want to do a “show and tell” blog about both how and why I created one of my latest artworks . . .
Angela Birchall
9/5/202510 min read
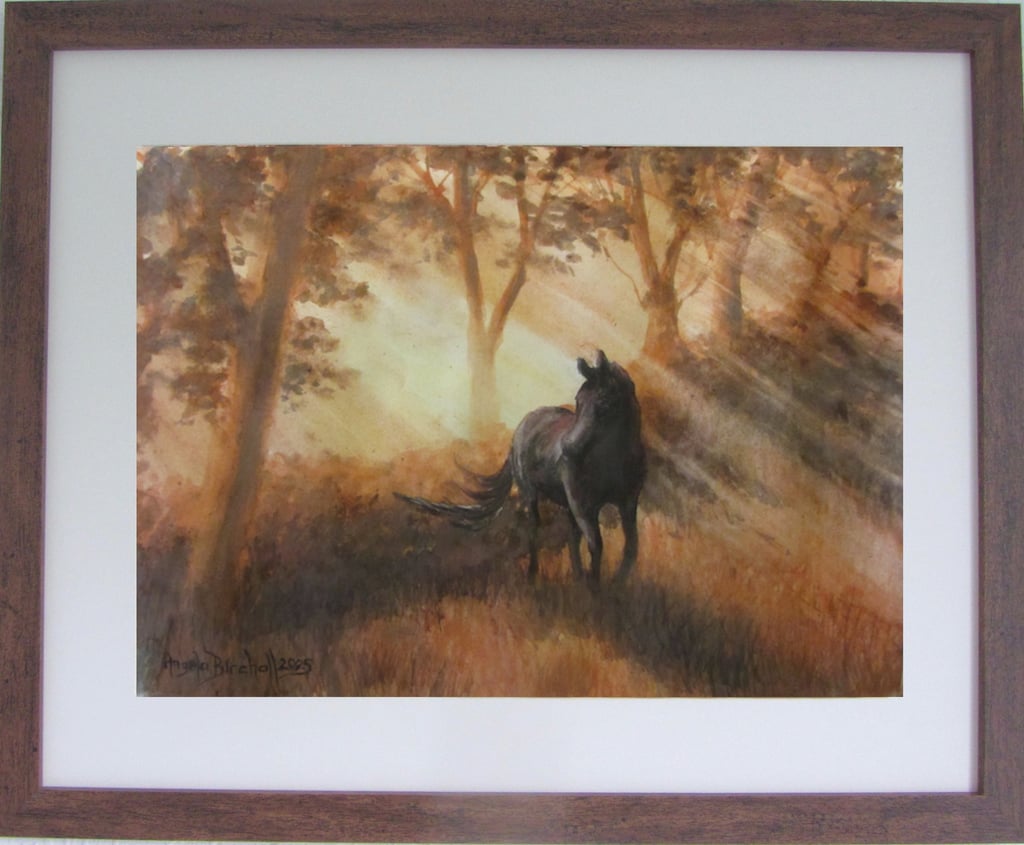
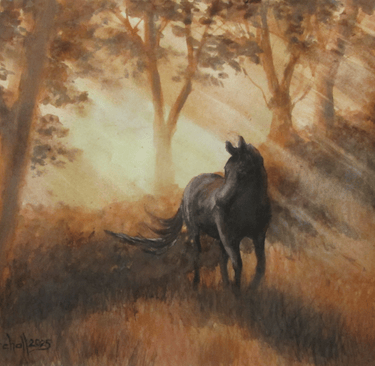
The painting features my sister’s horse, Darcy, in the golden glow of shafts of light coming through the trees around early sunset but I hadn’t told her who the model was. All she knew was that I was doing a painting of a horse in shafts of light.
When she saw the finished painting and her first reaction was: “Oh, it’s lovely; it looks like Darcy,” then I knew that it was a successful representation of her beloved horse. That was when I admitted that I had used one of my photos of Darcy for the main character.
However, the photo was taken in broad daylight in the arena, so how and why did I come to create the painting of the horse in sunset shades in a field of hedges and trees?
In a nutshell, the three elements that came together to inspire this painting was the “Beyond Monet” show, my experimenting with a new watercolour technique, and a lifetime love of dogs and horses.
The first of this inspiring trio was when I visited the “Beyond Monet” experience when it was showing in Liverpool and it brought back to the fore all the years of studying and loving Monet’s work. Of course we all know that Monet was obsessed with capturing light, and the effects of light were more important to him than the objects that were lit up – hence his various series of the same subject in different lighting conditions – so depicting light was my first element to include.
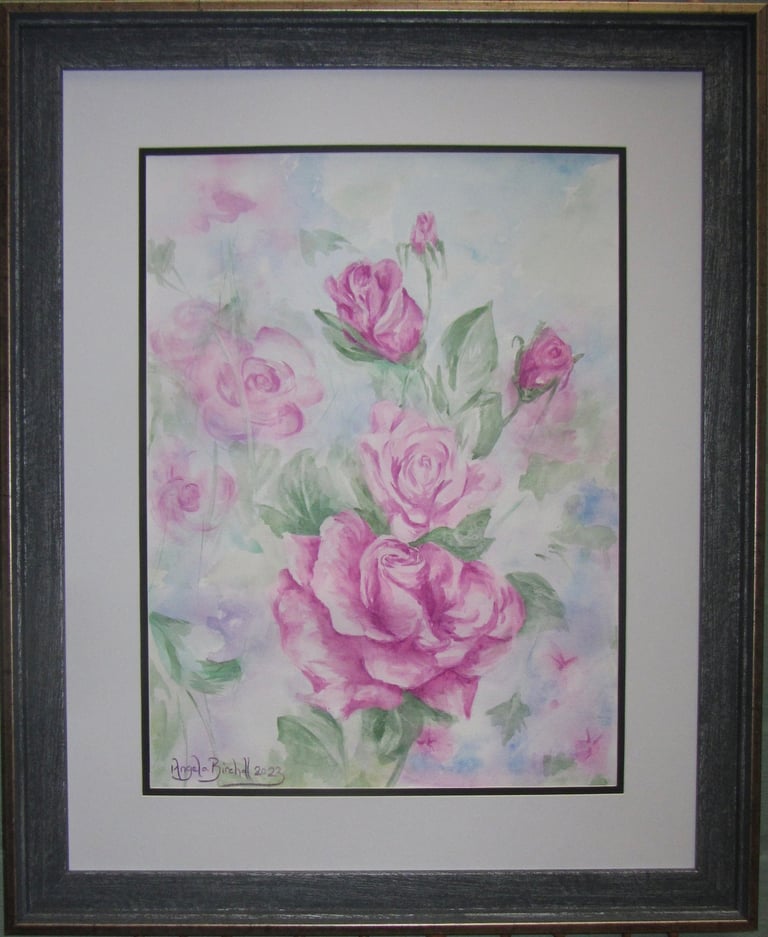
The second of the trio of elements is that in the past few months I have been experimenting with a variation of my usual love of wet-on-wet watercolour washes. That is where you wet the painting surface and then drop brushfuls of pigment onto the wet surface and let all the colours bleed and merge into one another. It can have some wonderful effects and is terrific for soft focus backgrounds contrasting with the main subject being in sharp focus. You can’t always be sure of how the paint will act with this method and can get some unusual effects such as finding a purple baboon looking at you from the bottom corner of a painting of pink roses!
Recently I have been experimenting with a technique of layering watercolour washes without blending or bleeding. I will explain more about it as I take you stage by stage through creating this painting.
That leaves the third inspiring element behind the image. As anyone who knows me well knows I love all animals but especially dogs and horses. They would also know that I can’t resist taking copious amounts of photos of them, so I had lots of potential models for a painting that combined light, new painting technique and horse as the main focus.
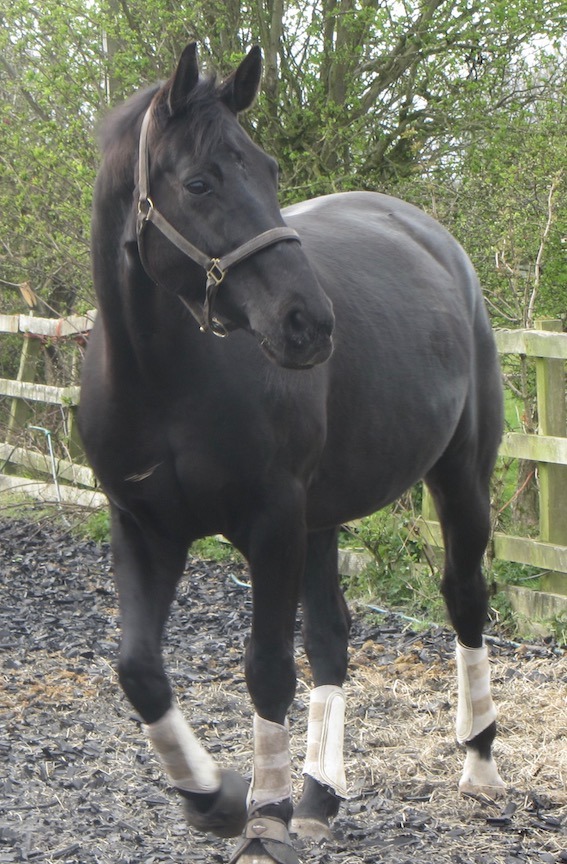
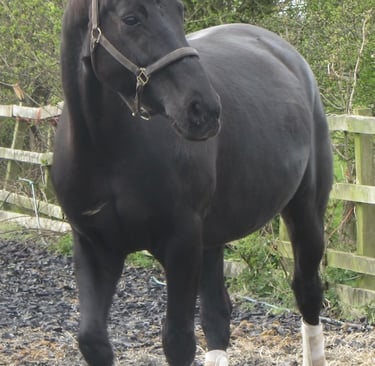
I wanted one with some interesting shape in the body rather than just standing straight either head-on or sideways. It also had to show the whole body, not just the head . . . I do so many pet portraits that I frequently just take head and shoulders shots of the horses so that ruled out a few hundred images! When I saw this photo of Darcy turning his head and neck round I knew that it was the one I wanted.
There is a level of emotion in the body pose: curiosity? Alarm? When you put it in the setting of the field with the sun’s rays putting him in the spotlight, it makes you think: Is it a flight animal about to take flight?
The observant among you will realise that he is looking in the other direction in the finished painting . . . I loved the pose shape but wanted him looking towards the rays of light, so I did flip the image.
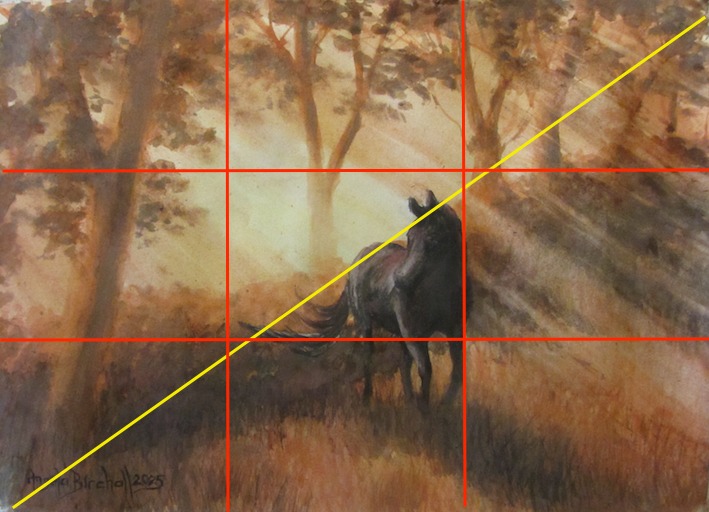
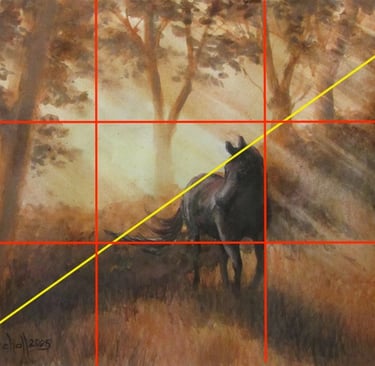
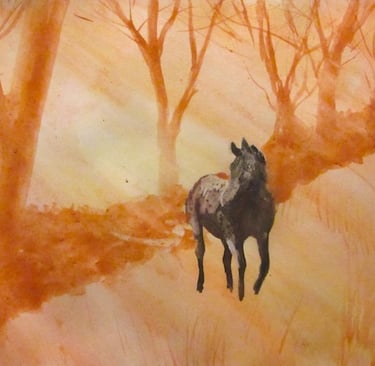
With the image selected I had to place him in the picture. As I spoke about in my last blog post on basic rules of third composition, you don’t put the main subject right in the centre of the picture plane. He is in the central panel of the picture, but on the right side of that panel.
As you can see from the diagram, the line of edge of his neck, shoulders and front leg sit on the right vertical third line, while the tips of his ears are nearly on the top horizontal third and the underneath of his body sits on the bottom horizontal third.
Where the light falls on his head plus the top of the rump and the swish of the tail gives a strong diagonal line through the painting which is echoed by the line of the hedge. Most importantly, that diagonal line means that when you look at the horse your gaze is then carried diagonally down in the direction that he is looking – it makes you wonder what has suddenly got his attention.
You follow his gaze and once you get to the dark shadowy bottom corner your gaze is taken up the foreground tree at the top of which all the shafts of light then carry your gaze across the top of the picture plane dropping down the shafts of light going in the opposite diagonal direction. Before you know it, you are back looking at Darcy having gone round the full picture and you are still wondering what he’s watching. Not having found an obvious answer, you can make up your own version of the story: has he seen his friend just coming into the field, has he heard his feed bucket being prepared and knows he’s about to come into his cosy stable for the night, or is it a potential predator that he’s about to race away from? (In Darcy’s case it’s likely to be the second one!)
Composition
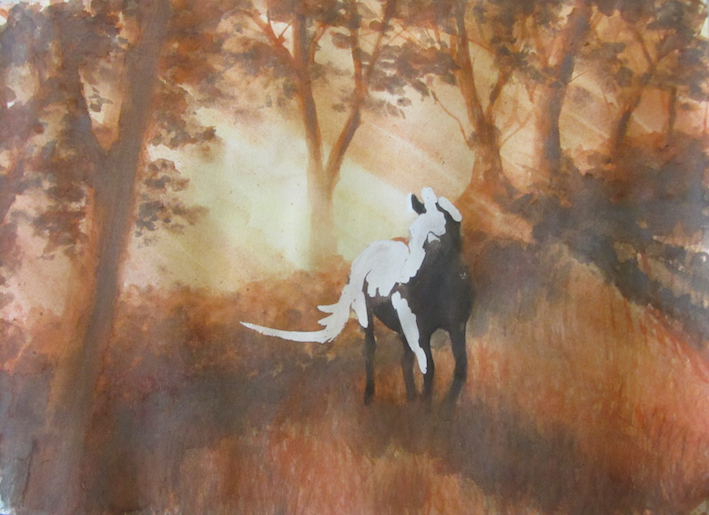
Having placed him in the picture and knowing that a) I was going to be using washes across the whole page, and b) that I wanted strong lights touching the top and sides of his body that were a different colour to the light on the bushes and trees, I also needed to mask out those areas of light.
For anyone who doesn’t know about masking, you paint on a fluid that dries looking a bit like pva glue, and you can paint over it as many times as you want and when that paint is dry, you rub the dried masking fluid and it peels off to reveal the original white paper which you can then paint a different colour or leave white. It will become obvious as the painting goes on.
Now I can start painting
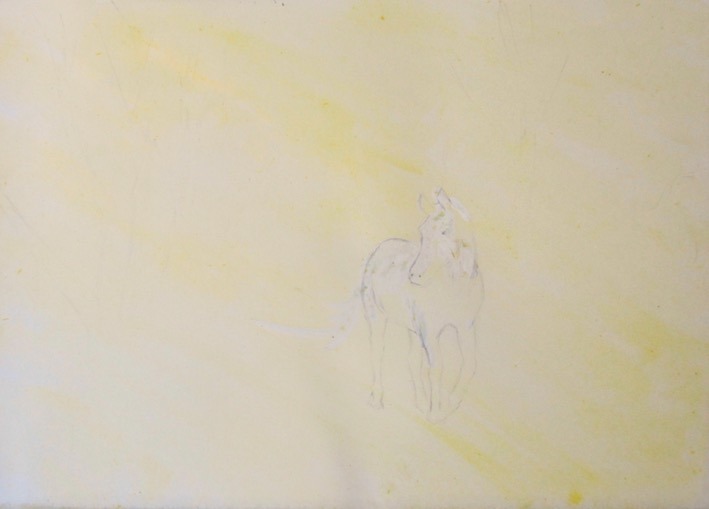
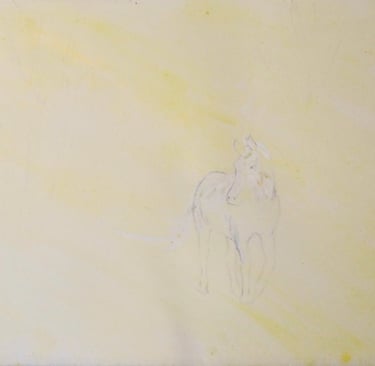
The first wash is the lightest wash and it’s a bright yellow, not a lemon yellow which works better with greens than browns. I painted it onto dry paper but with a very wide wash brush and lots and lots of water compared to the amount of pigment that I used.
The key to it was to set up the direction of the shafts of light and take every brushstroke in that direction, also to use sweeping strokes that went the full diagonal width of the page rather than little, hesitant strokes.
When the yellow wash was dry, I added some orange washes using the same directional strokes but also fading out the amount of pigment I used when it came to the area where the light is going to be shining onto Darcy. You can also see where the masking fluid is protecting the area I wanted to keep white for the time being.
The key to the watercolour wash technique that I’m using is that the wash goes on lightly over the top of the previous wash and is not rubbed or blended to merge them together.
The next layers start to give the whole thing a context as I start placing the main trees and hedge line, then the first layer of Darcy. Yes, he’s a black horse but as my students know, I never use solid black, a) it looks flat and lifeless and b) Monet wouldn’t like it! (He maintained that solid black didn’t appear in reality so he never used it.)
Thus the black has to have the addition of either red or blue depending on whether I want to make it a warm colour (red) or cool colour (blue). In a warm light then the shadows are cool.
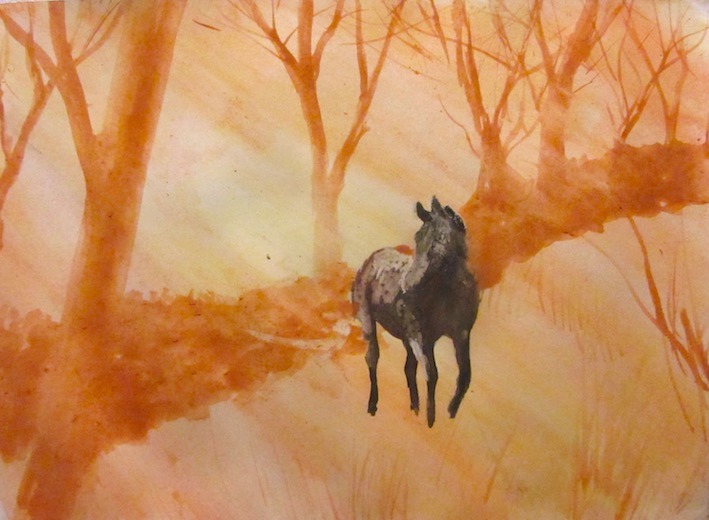
This one doesn’t look too dissimilar to the previous picture but it has two more layers of washes added to start building up the depth of colour on the trees and hedges which, apart from the horse, are going to be the darkest part of the painting.
To a limited extent this is starting to build up shadows but these only really start appearing in the next stage. I have also started adding in some of the thinner branches with a rigger brush which gives you long, flowing lines that can be laid on in the wash technique that I am using.
Now we are starting to see the warm and cool colours that you need in a scene like this. The orange/gold of the shafts of light are warm colours so to give a cool contrast for the shadows you need a brown that contains more blue than the warm browns where red dominates.
Before anyone tells me that all browns must have black or blue to turn them from orange to brown, the difference is warm browns have more red than either black or blue but even a brown made with black is not as cool as a brown made with blue. If you look at the browns on the trees and the leaves at the top it is a warmer brown compared to the browns of the deep shadows starting to form at the base of the hedges and in front of Darcy.
In both this photo and the next one you can see layers of washes are building up the shadows and creating the 3D effect of the roundness of the tree trunks and branches. Because the scene is backlit the light has to shine on the outer edges of the tree trunks and branches so they stay in their first layer of colour. Meanwhile the roundness and shadows are created by washes of shadow colour getting narrower and narrower leaving only the centre of the trunks and branches getting the next layer of paint.
I used the same process with the clusters of leaves with the outer edges in the original pale browns and getting darker as it goes to the deepest part of the clusters of leaves. Then I used a fan brush to start creating layer upon layer of grass in the foreground. That grass had to create a pattern of light and shadows coming from the hedge, each of the trees, and the horse, while always keeping the diagonal pattern of the shafts of light.
With a wash technique like the majority of this picture is painted in I am aiming to build the layers and depths of colour as a soft, gradual progression so the washes are dropped lightly on top of the previous layers and not worked in. Thus, each brushstroke has to go in the right place first time and just stay where it’s put rather than being manipulated with brushing back and forth. It is an interesting technique that I am enjoying experimenting with.
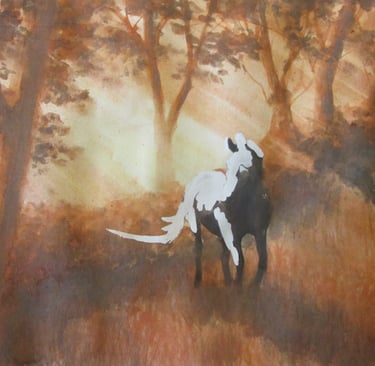
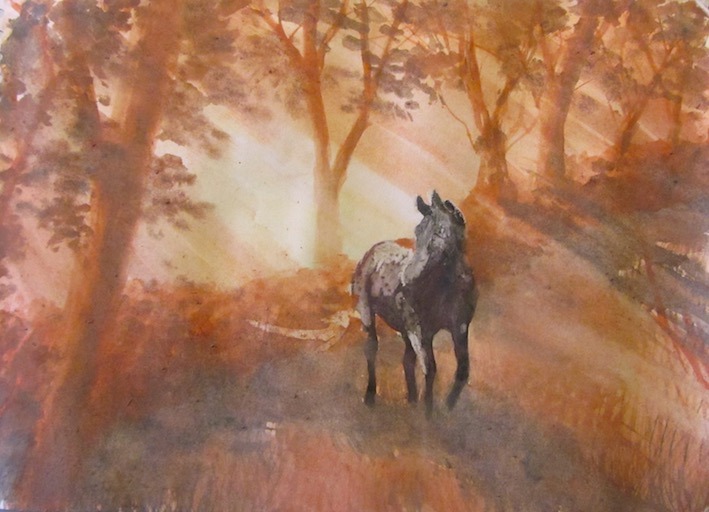
Here more layers have created even deeper shadows on the trees, hedges and foreground grass which makes the shafts of light stand out even more. It is what my other art hero, Leonardo Da Vinci, called “chiaroscuro” where the lightest light against the darkest dark creates the strongest contrasts and gives the greatest 3D effect.
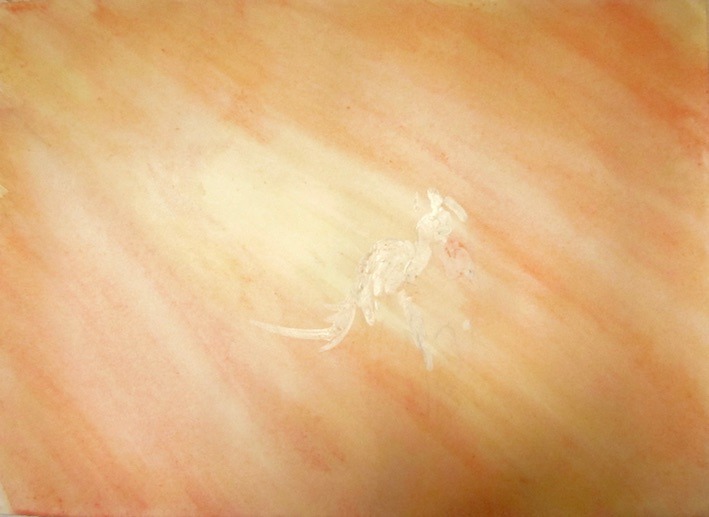
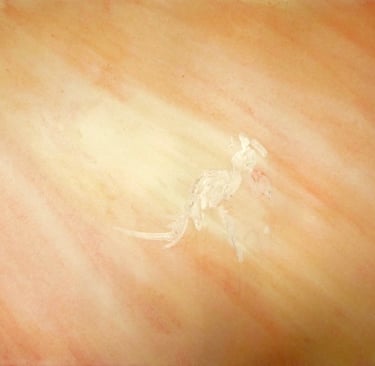
However, the thing that stands out the most in this image is that once it was fully dried I removed the masking fluid from the horse and you can see how it has taken it back to the pure white paper that I began with.
Masking out
Darcy is unmasked

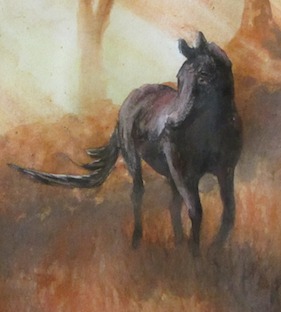
Look at this close-up where I am starting to paint Darcy. The parts of the horse where the light is hitting him you can see that it’s a wash of black with a definite addition of red to warm it up.
He’s obviously a black horse but the black is varying shades of grey from a very pale wash that has hardly touched the original white through to the darkest shadows on the right front, under the head, inside of the legs, etc. While the light black sections have red added to black, the darkest shadows have blue added.
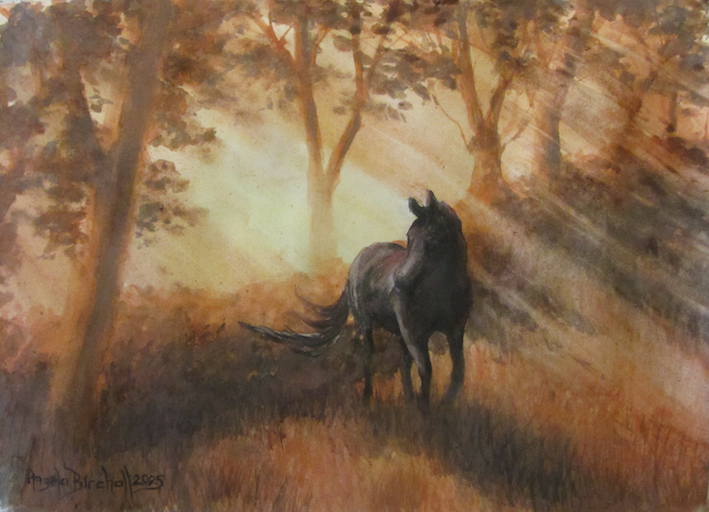
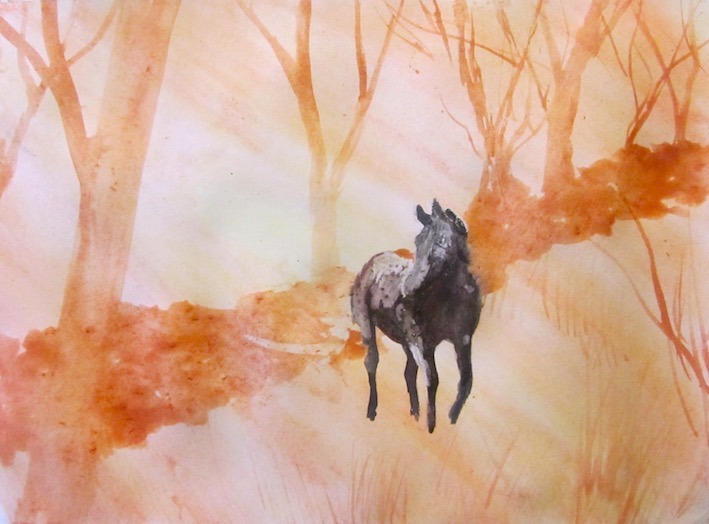
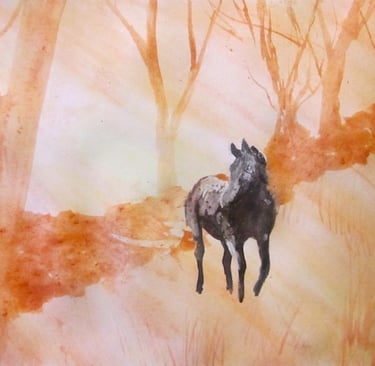
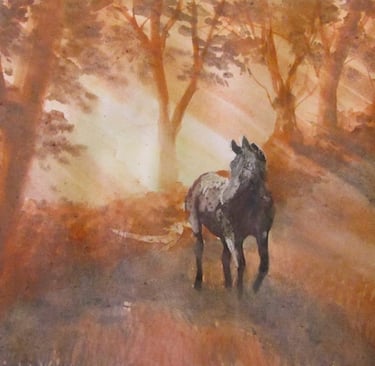
In the final stages I played around with more depth of shadow on the horse as well as darker shadows on the grasses, always having to keep the latter going in the direction of the shafts of light.
In the final touches I didn’t use any colour, instead I was gently laying on washes of clear water which were allowed to seep in just sufficiently to start to break into the layers of washes before a damp brush went through to lift out sufficient colour to accentuate the shafts of light without actually removing everything that was underneath it. Look at the trees on the right especially and you can see the light streaming through but you still know that there’s a tree or hedge behind it.
Darcy has now taken up residence in his new home at my sister’s . . . well, he is her horse! Right now I am working on another project using the same technique which will have a mare and an adorable little foal bathed in the shafts of sunlight. The mare is quietly grazing while curiosity gets the better of the little foal and he is walking towards us.
When it is completed, that picture will be heading for the Southport Contemporary Arts “Autumn Open” exhibition which runs from September 30th to October 18th at the SCA’s ArtHouse gallery in Eastbank Street, Southport. It has the theme of “Autumn Glow” so it’s ideal for this next painting of my equine friends bathed in shafts of warm light from the setting sun.
Get in touch
Use the message box to drop me a line if you want to:
purchase my paintings or drawings;
discuss commissioning me to create a unique work of art especially for you;
have a question to be answered in a future Picture Perfect blog post;
join one of my face-to-face painting or drawing classes in West Lancashire or have private coaching online;
discuss a bespoke staff development event using art to encourage teamwork and leadership
Contacts
0044 77242 00779
youcandrawandpaint@gmail.com